- ✅ Created a webhook endpoint in your application
- ✅ Registered it with Magic Hour
- ✅ Tested it with a real API call
- ✅ Verified webhook delivery works
How Webhooks Work
Webhooks let you receive real-time notifications when your API requests complete, instead of polling for status updates.Step 1: Create Your Webhook Endpoint
First, let’s create a simple webhook handler that can receive and process events.Using Jupyter/Colab? The server examples below are for standalone deployment. For notebook
testing:
- Use webhook.site for instant webhook testing (no code needed). See the “webhook.site” tab in Step 2
- Or use the notebook-friendly code in the “Colab/Jupyter” tab below
Step 2: Make Your Endpoint Publicly Accessible
Your webhook endpoint needs to be accessible from the internet. For testing, use one of these options:- ngrok (Recommended)
- webhook.site (Quick Testing)
- Colab/Jupyter Setup
Install ngrok:Start your server:Expose it publicly:Copy the HTTPS URL (e.g.,
https://abc123.ngrok.io)Step 3: Register Your Webhook
Visit Developer Hub
Go to Magic Hour Developer Hub, and click Create Webhook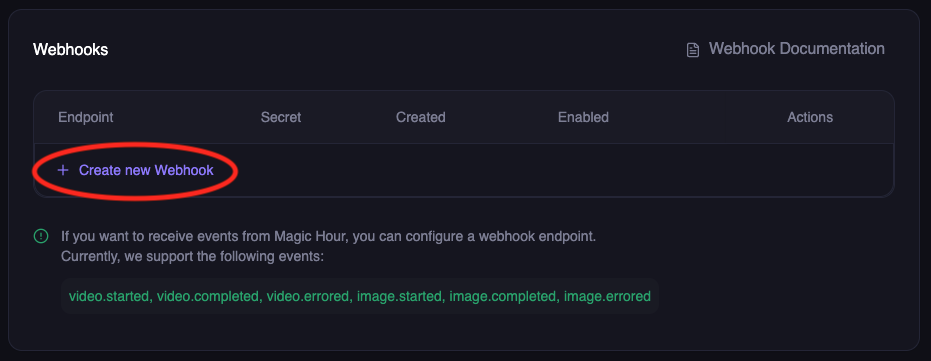
Configure webhook
Enter your webhook details:
- Endpoint URL: Your public HTTPS URL (e.g.,
https://abc123.ngrok.io/webhook) - Events: Select the events you want to receive:
-
video.started- When video processing begins -
video.completed- When video is ready for download -
video.errored- When video processing fails -
image.started- When image processing begins -
image.completed- When image is ready for download -
image.errored- When image processing fails -
audio.started- When audio processing begins -
audio.completed- When audio is ready for download -
audio.errored- When audio processing fails
-
Step 4: Test Your Webhook End-to-End
Now let’s verify everything works by making a real API call and watching for the webhook.Start monitoring your webhook
If using your own server: Watch the console logsIf using Colab/Jupyter: Watch the cell output for webhook eventsIf using webhook.site: Keep the browser tab open to see incoming requests in real-time
Step 5: Download Your Result
Your webhook received the download URL. Let’s grab the generated image:🎉 Congratulations!
You’ve successfully:- ✅ Created a webhook endpoint
- ✅ Registered it with Magic Hour
- ✅ Tested it with a real API call
- ✅ Received webhook notifications
- ✅ Downloaded the generated content
Next Steps
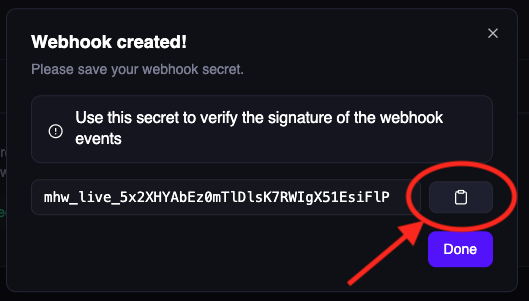
Secure Your Webhook
Add signature verification to ensure webhooks are from Magic Hour
Event Types Reference
See all available webhook events and their payloads
Production Deployment
Deploy your webhook handler to production
Webhook Reference
Explore the complete webhook API reference
Troubleshooting
Webhook not receiving events?- ✅ Check your endpoint URL is publicly accessible
- ✅ Ensure your server returns HTTP 2xx status codes
- ✅ Verify the webhook is enabled in Developer Hub
- ✅ Check server logs for errors
- ✅ Install required packages:
!pip install fastapi uvicorn nest-asyncio pyngrok - ✅ Make sure the server thread started successfully
- ✅ Check if ngrok tunnel is active and accessible
- ✅ Try webhook.site as an alternative for quick testing
- ✅ Make sure you’re using the Colab/Jupyter code version with
nest_asyncio.apply() - ✅ Don’t run
uvicorn.run()directly in notebooks - use the threading approach shown above